Headlight aiming
2C_HeadLightAiming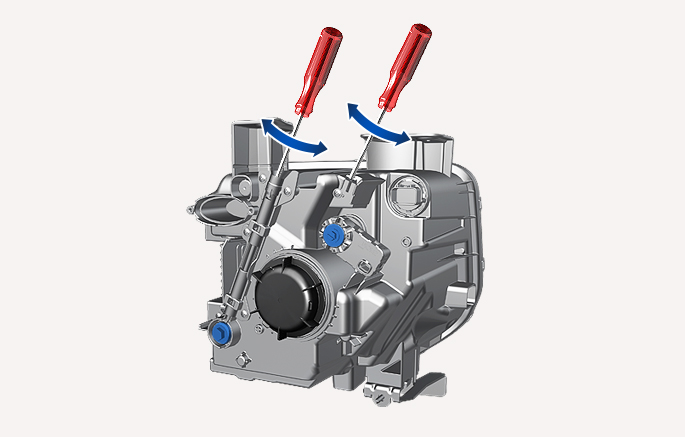
-
Inflate the tires to the specified pressure and remove any loads from the vehicle except the driver, spare tire, and tools.
-
The vehicle should be placed on a flat floor.
-
Draw vertical lines (vertical lines passing through respective headlight centers) and a horizontal line (horizontal line passing through center of headlights) on the screen.
-
With the headlight and battery in normal condition, aim the headlights so the brightest portion falls on the horizontal and vertical lines.
-
To aim the low beam left or right, turn the driver clockwise or counterclockwise. To aim the low beam up or down, turn the driver clockwise or counterclockwise.
To aim the high beam up or down, turn the driver clockwise or counterclockwise.
1C_AimingPoint 1C_AimingPoint_2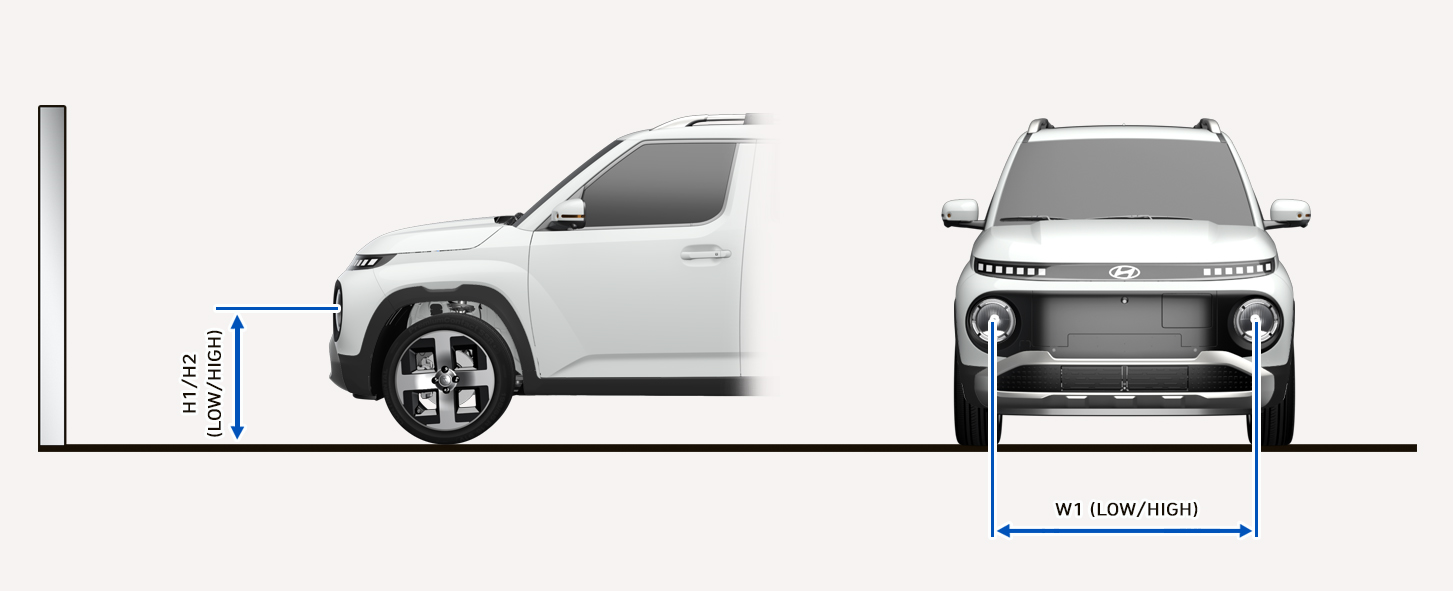

- H1: Height between the headlight center and ground (Low beam)
- H2: Height between the headlight center and ground (High beam)
- W1: Distance between the two headlights centers (Low/High beam)
|
Vehicle condition |
Lamp type |
H1 |
H2 |
W1 |
|
Without driver mm (in.) |
Type A |
626 (24.6) |
626 (24.6) |
1212 (47.7) |
|
Type B |
636 (25) |
580 (22.8) |
||
|
With driver mm (in.) |
Type A |
616 (24.3) |
616 (24.3) |
1212 (47.7) |
|
Type B |
626 (24.6) |
570 (22.4) |
1C_BasedOn10mScreen
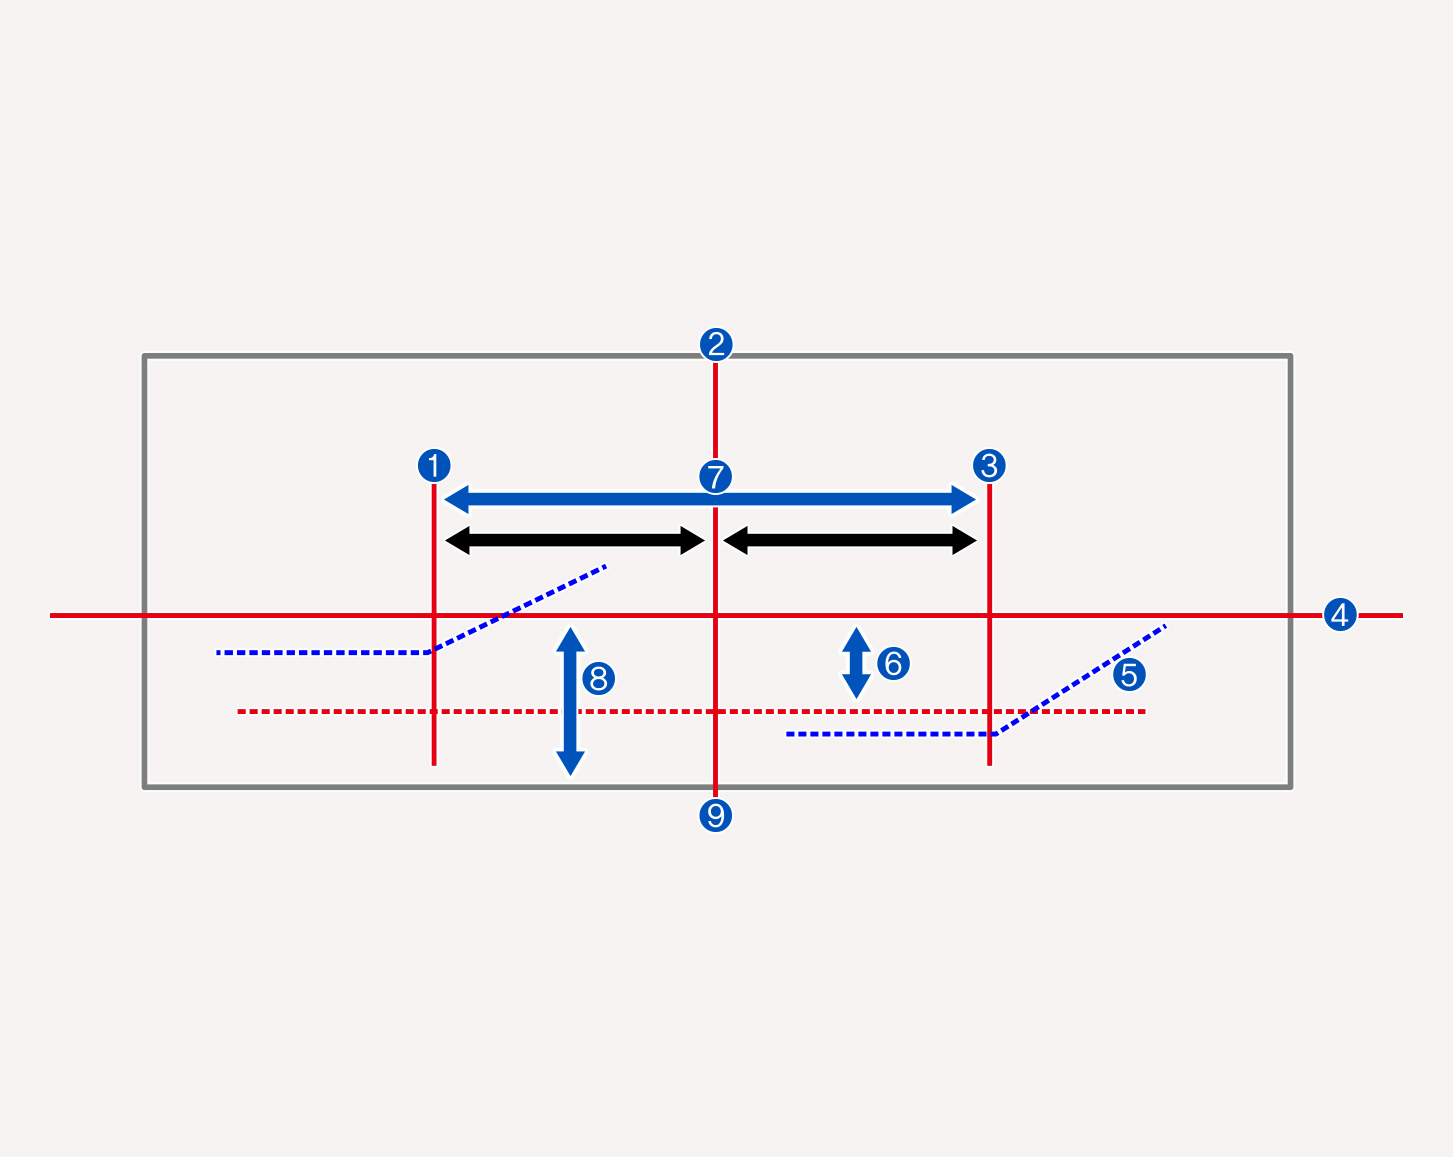
- Vertical line of the left headlight bulb center
- Car axis
- Vertical line of the right headlight bulb center
- Horizontal line of headlight aiming center
- Cut-off line
- 100 mm (Based on 10 m)
- W1 (Low/High beam)
- H1/H2 (Low/High beam)
- Ground
-
Turn the low beam on without driver aboard.
-
The cut-off line should be projected in the cut-off line shown in the picture.
-
When aiming the low beam, vertical aiming should be adjusted after adjusting the horizontal aiming.
-
If headlight leveling device is equipped, adjust the headlight leveling device switch to "0".