Seat Belt Restraint System
Improperly positioned seat belts may increase the risk of serious injury in a crash. Take the following precautions when adjusting the seat belt:
-
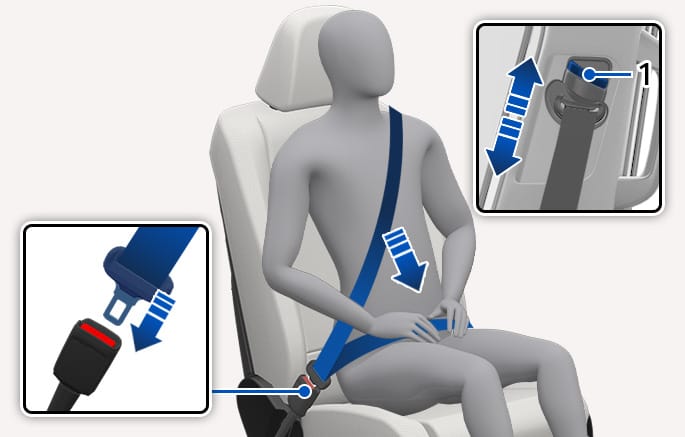
Position the lap portion of the seat belt as low as possible across your hips, not on your waist, so that it fits snugly. This allows your strong pelvic bones to absorb the force of a collision, reducing the chance of internal injuries.
-
Position one arm under the shoulder belt and the other over the belt, as shown in the illustration.
-
Always position the shoulder belt anchor into the locked position at an appropriate height.
-
Never position the shoulder belt across your neck or face.
If you cannot smoothly pull the seat belt out from the retractor, pull the seat belt out firmly and release it. After release, the belt may be pulled out smoothly.
Fastening your seat belt
2C_AdjustSeatBelt
- Height adjuster button
-
Pull the seat belt out of the retractor and insert the metal tab buckle. An audible "click" sounds when the tab locks into the buckle. Make sure the seat belt is not twisted.
-
Place the lap belt portion across your hips and the shoulder belt portion across your chest.
The seat belt automatically adjusts to the proper length after the lap belt portion is adjusted manually so that it fits snugly around your hips. If you lean forward in a slow, easy motion, the belt extends and moves with you.
If there is a sudden stop or impact, the belt will lock into position. It will also lock if you try to lean forward too quickly.
-
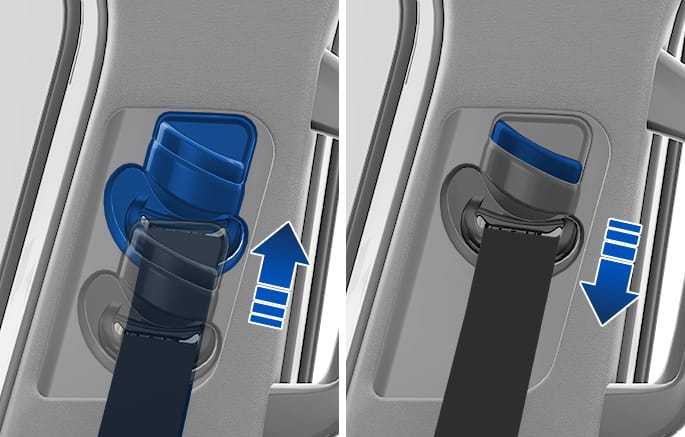
Adjust the height of the shoulder belt so that it lies across your chest and midway over your shoulder nearest the door, not over your neck.
-
To raise the height, pull it up. To lower it, push it down while pressing the height adjuster button. Release the button to lock the anchor in place. Try pushing the height adjuster down to make sure that it is locked in place.
-
Releasing your seat belt

2C_SeatBeltRelease
Press the release button in the locking buckle.
The belt should automatically draw back into the retractor. If this does not happen, check the belt is not twisted, then try again.
2C_AdjustSeatBeltHeight
Adjust the height of the shoulder belt so that it lies across your chest and midway over your shoulder nearest the door, not over your neck.
Pull it up to raise the height. To lower it, push it down while pressing the height adjuster button.
Release the button to lock the anchor in place. Try pushing the height adjuster down to make sure that it is locked in place.
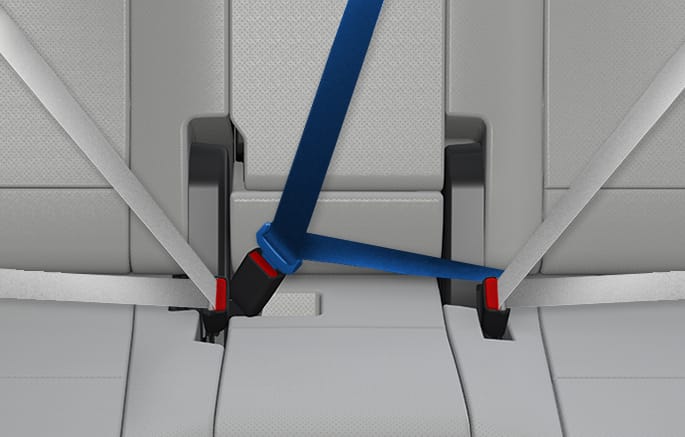
2C_RearCenterSeatBeltWearStep
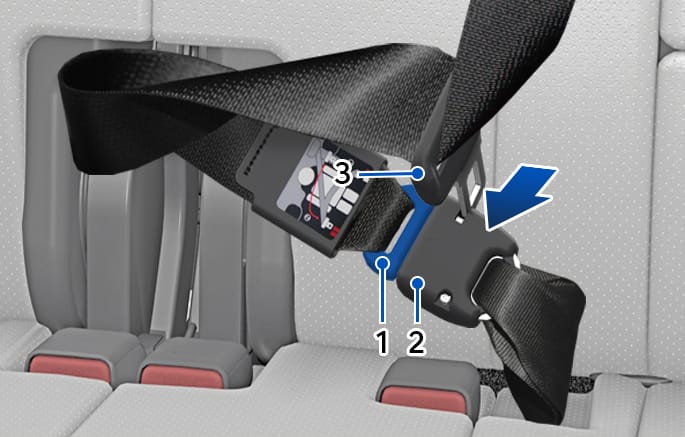
Insert the tongue plate into the buckle until an audible "click" is heard, indicating the latch is locked. Pull the shoulder portion of the belt to snug the belt across your hips and remove slack. Make sure the seat belt is not twisted.
When using the rear center seat belt, use the buckle with the CENTER mark.
Make sure the seatback is locked in place when using the rear center seat belt. If not secure, the seatback may move if there is a sudden stop or crash and result in serious injury or death.
This type of seat belt combines both an emergency locking retractor and an automatic locking retractor. Convertible retractor type seat belts are installed in the rear seat positions to help accommodate the installation of Child Restraint Systems.
A convertible retractor is also installed in the front passenger seat position, children should always be seated in the rear and never place any infant/child restraint system in the front seat.
Fastening your seat belt
Pull the seat belt out of the retractor and insert the metal tab into the buckle. An audible "click" sounds when the tab locks into the buckle. Pull the shoulder portion of the belt to snug the belt across your hips and remove slack. Make sure the seat belt is not twisted.
When not securing a child restraint, the seat belt automatically adjusts to the proper length only after the lap belt portion of the seat belt is adjusted manually so that it fits snugly across your hips.
When the seat belt has been fully extended from the retractor to allow for the installation of a child restraint system, the seat belt operation changes to allow the belt to retract, but not to extend (Automatic Locking Retractor Type). For more information, refer to Child Restraint System.
Releasing your seat belt
2C_SeatBeltRelease
Press the release button in the locking buckle.
The belt should automatically draw back into the retractor. If this does not happen, check the belt is not twisted, then try again.
-
The emergency locking mode allows seated passengers to move freely in their seats while keeping some tension on the belt. During a collision or sudden stop, the retractor automatically locks the belt to help restrain the passengers.
-
To deactivate the automatic locking mode, unbuckle the seat belt and allow the belt to fully retract.
To fasten your seatbelt:
-
Extract the tongue plate (1) from the hole on the belt assembly cover.
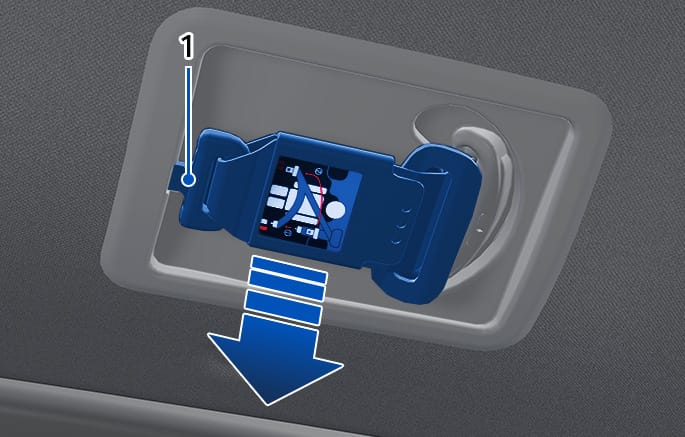
2C_3ndCenterSeatBelt_1
-
Insert the tongue plate (1) into the buckle (2) until an audible “click” is heard, indicating the latch is locked. Make sure the belt is not twisted.
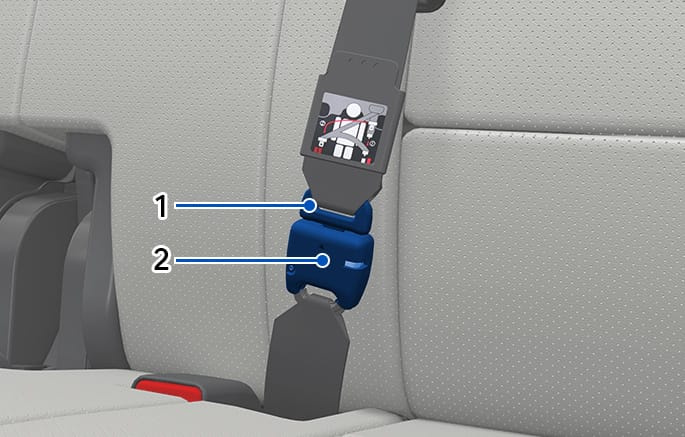
2C_3ndCenterSeatBelt_2
-
Pull out the tongue plate (3) from the pocket. Pull the tongue plate (3) and insert it into the buckle (4) until an audible “click” is heard, indicating the latch is locked. Make sure the belt is not twisted.
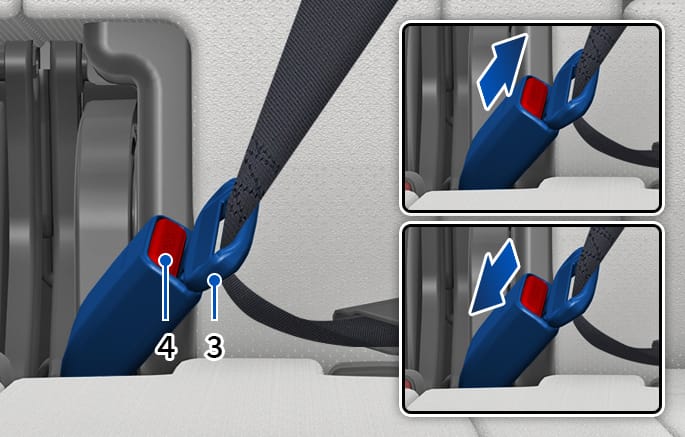
2C_3ndCenterSeatBelt_3
When using the rear center seat belt, the buckle with the “CENTER” mark must be used.
If you are not able to pull out the safety belt from the retractor, firmly pull the belt out and release it. After release, you will be able to pull the belt out smoothly.
To release your seatbelt:
-
Press the release button on the buckle (4) and remove the tongue plate (3).
2C_3ndCenterSeatBelt_4
-
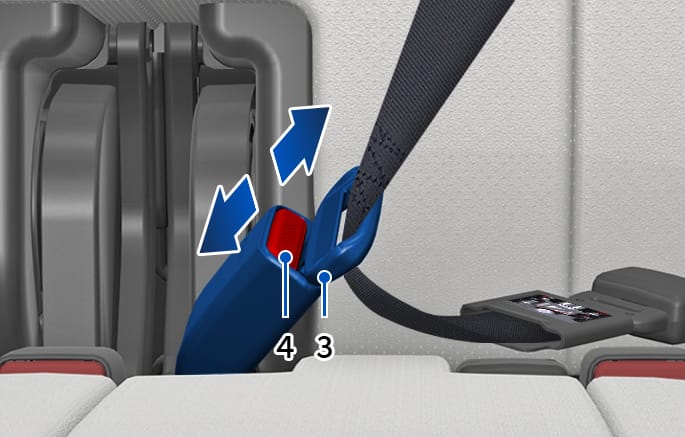
To retract the rear center seatbelt, insert the tongue (3) plate into the web release hole (2). Pull up on the seat belt web and allow the webbing to retract automatically. Insert the tongue plate (1) into the hole on the belt assembly cover.
2C_3ndCenterSeatBelt_5