Setting Electric Vehicle Specialized Functions
You can set various EV specialized functions such as battery conditioning mode and utility mode.
If the high voltage battery temperature is too high or too low, and there is a risk that the battery's charging performance may deteriorate. The battery conditioning function may be used to ensure DC charging performance as at room temperature. You can manually operate the Battery Conditioning function or automatically operate the function by setting a DC charging station as a destination or a waypoint.
Manual operation
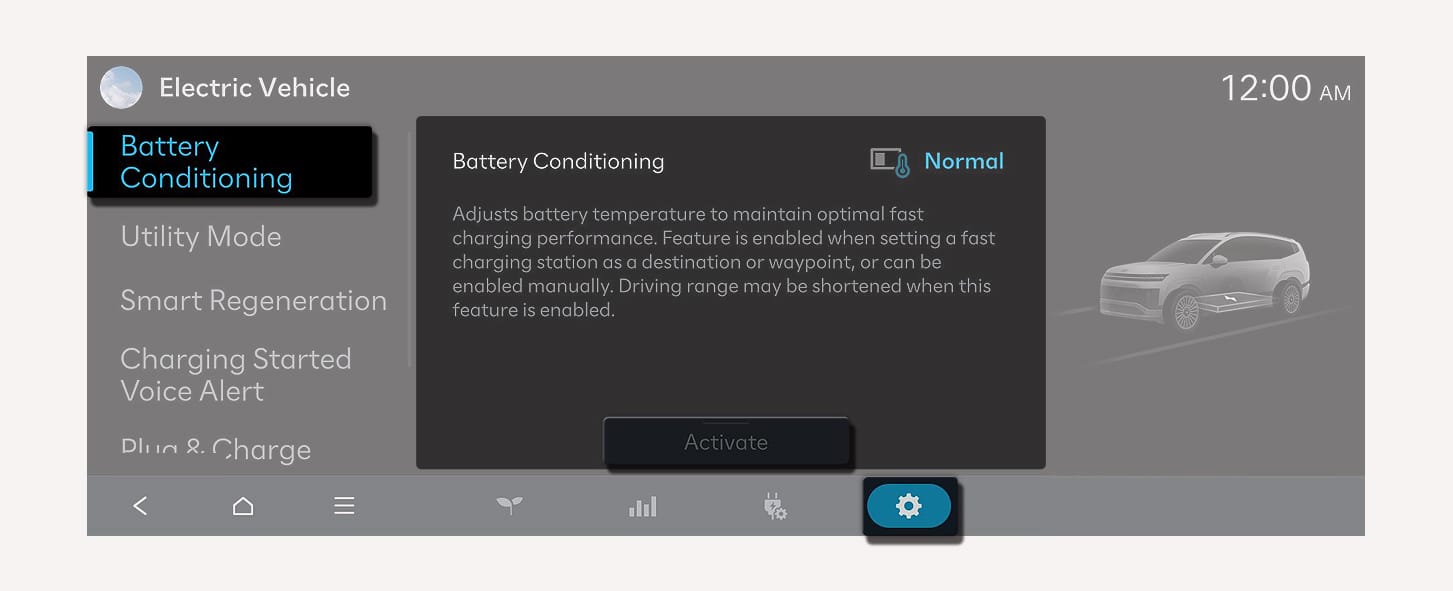
1C_BatteryConditioning
On the Home screen from the infotainment system, select Electric Vehicle >
Linked to navigation route
If you set a DC charging station as a destination or waypoint on your navigation, the Battery Conditioning function maintains the battery temperature ideal for DC charging while considering the arrival time. This allows drivers to secure DC charging performance as at room temperature even during hot and cold weather.
-
Battery Conditioning function operates only in a vehicle equipped with a battery heater.
-
Battery Conditioning function does not operate to ensure driving distance when the battery charge level is low. The function also does not operate if the temperature of the battery is ideal for charging.
-
The charged power used to raise the temperature of a battery may shorten the driving distance. Reaching the optimal temperature of a battery requires time.
-
When you are a member of Bluelink, you can control the Battery Conditioning function remotely while parking from the Bluelink app. In this case, the battery conditioning mode will end either when the battery temperature reaches the appropriate range or after 30 minutes. For more information on Bluelink, refer to the separately supplied manual.
-
The following symbols appear on the Battery State of Charge (SOC) gauge when the Battery Conditioning function is operating:
-
ǀ : The battery is being heated up -
ķ : The battery is being cooled down
-
Utility mode allows the high voltage battery to be used instead of the 12 V battery for purposes other than driving.
-
You cannot drive the vehicle while the utility mode is activated, and the gear can only be shifted to P (Park).
-
You can use every electric device in the vehicle while the utility mode is activated.
-
When the utility mode is activated, the Electronic Parking Brake (EPB) is applied automatically. You can release EPB by pressing the EPB switch if necessary.
-
Check the operation conditions of the utility mode.
Check if the
¢ indicator is displayed on the instrument cluster.Check if the reducer is shifted to P (Park).
-
On the Home screen from the infotainment system, select Electric Vehicle>
Ĵ > Utility Mode, and then select Activate Utility Mode to activate the function (Utility Mode: ON).
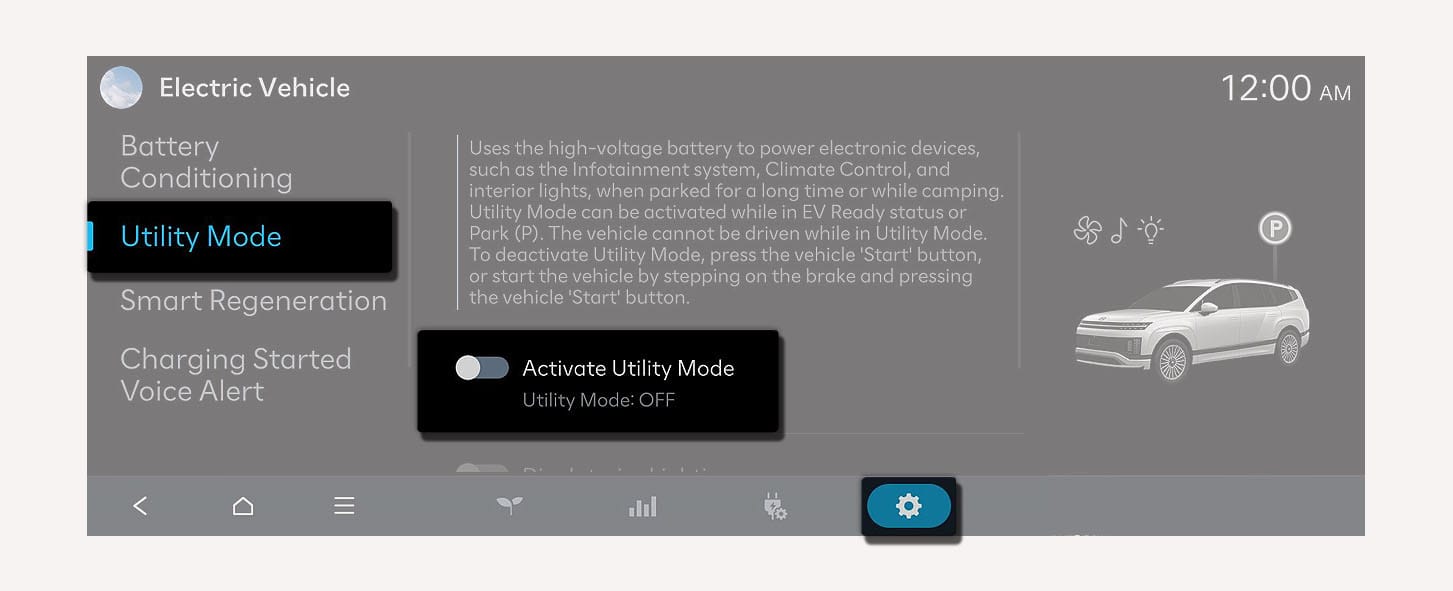
1C_UtilityMode
-
The
¢ indicator turns off and theų indicator illuminates on the instrument cluster and the EPB is applied. -
The utility mode can be deactivated by pressing the Start/Stop button to the OFF position.
If the utility mode is not activated when the vehicle is in the READY mode and the gear is shifted to P (Park), inspect the operation status of EPB.
When charging with a DC charger, you can use the Plug & Charge function to charge your electric vehicle quickly and easily.
Setting the Plug & Charge
Follow the instructions below to charge your electric vehicle setting the Plug & Charge.
-
On the infotainment screen, move to Home screen.
-
On the Home screen, select Electric Vehicle >
Ĵ > Plug & Charge, and then select Plug & Charge to turn on the function.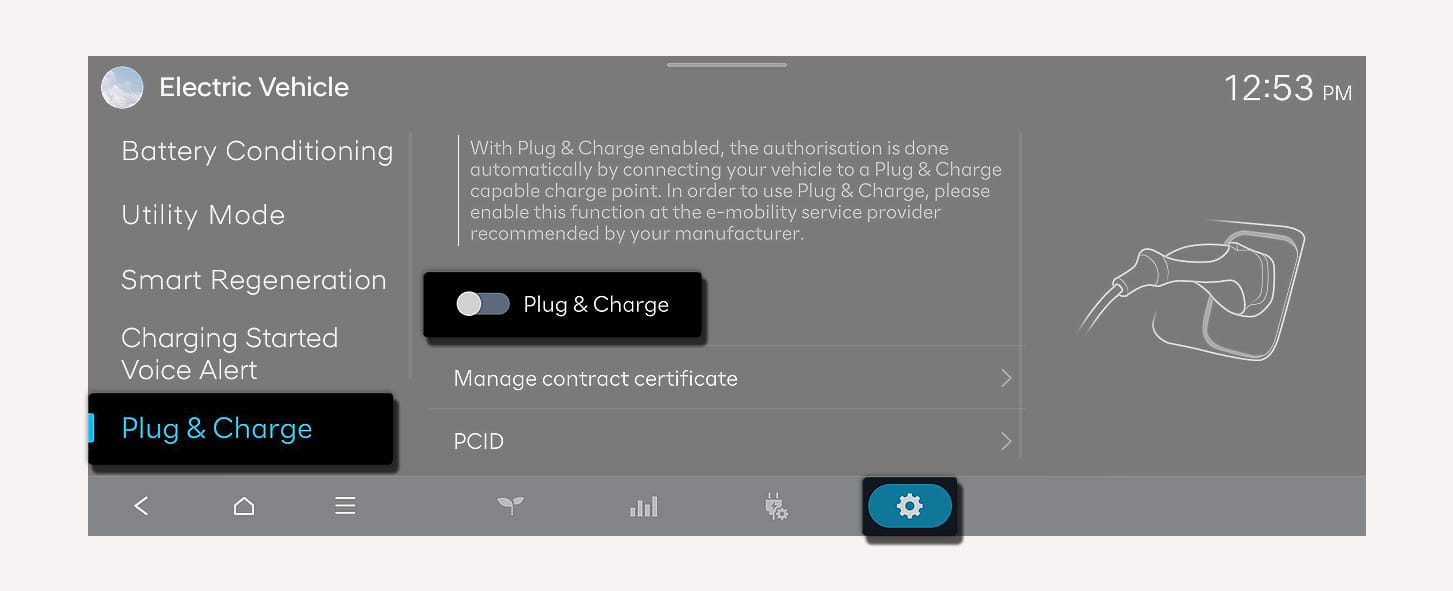
1C_PnCSettings
If you do not have a Plug & Charge contract, turn off the Plug & Charge. If the function is turned on, problems with the charging process may occur.
Renewing the Plug & Charge
If the Plug & Charge does not proceed or fails during the process, check the expiration and renewal status of the contract certificate
-
The Plug & Charge does not proceed if the certificate has expired.
-
Turn off the Plug & Charge function and use an external payment method until you check the certificate status. If the Plug & Charge fails more than 2 times, the payment method is forcibly switched to an external payment method from the third attempt.
To reset and enable Plug & Charge again after the payment method is forcibly switched to an external payment method, follow one of the instructions below:
-
Charge once using an external payment method. Plug & Charge is available from the next charge.
-
Disconnect the charging plug, close the charging door, and wait at least 1 minute with the vehicle on.
-
Use another charger that is Plug & Charge enabled.
If the contract certificate for the Plug & Charge has expired or withdrawn, follow the instructions below:
-
Make a new contract to issue or renew the certificate.
-
Connect the charging plug and try Plug & Charge once.
-
The charger displays the expiration and withdrawal status of the certificate and the charging is failed.
-
-
Disconnect and reconnect the charging plug and retry charging.
-
The newly contracted certificate is installed and charging proceeds normally.
-
Managing the Plug & Charge contract
If a new agreement certificate is installed, the Manage Agreements option becomes available. To see its details or manage it, follow the instructions below:
-
On the infotainment screen, move to Home screen.
-
On the Home screen, select Electric Vehicle >
Ĵ > Plug & Charge, and then select Manage Agreements. -
Check the contractor information and expiration date (year/month) displayed on the screen.
-
You can delete the certificate by pressing Delete if necessary.
-
You can choose the charging station, the detailed information is provided.
When you sign up for HYUNDAI Bluelink service, the available chargers at each charging station appears.
-
On the Home screen from the infotainment system, select Electric Vehicle >
Đ > Charging Station List.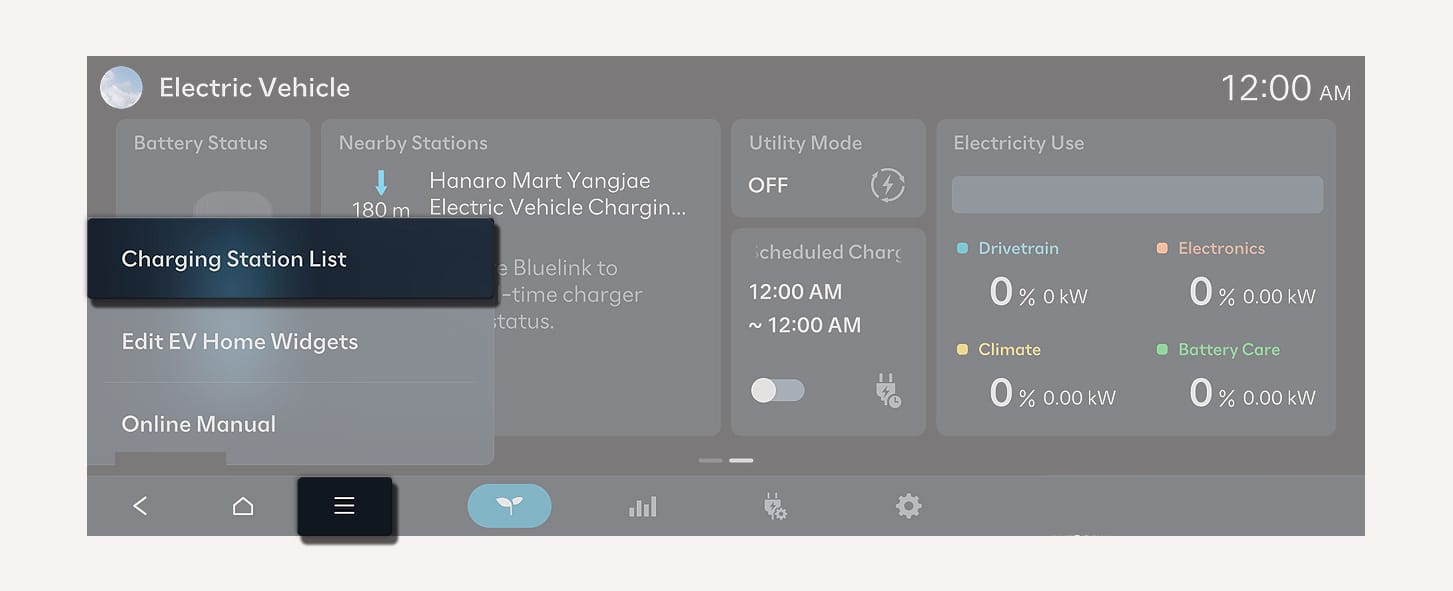
1C_ChargingStationListMenu
-
You can choose among Route, Current Position, Destination, and Favorite.
-
The direction (arrow) and distance, charger type, address, and location on the map of the charging stations corresponding to the selected option are displayed on the left side of the screen.
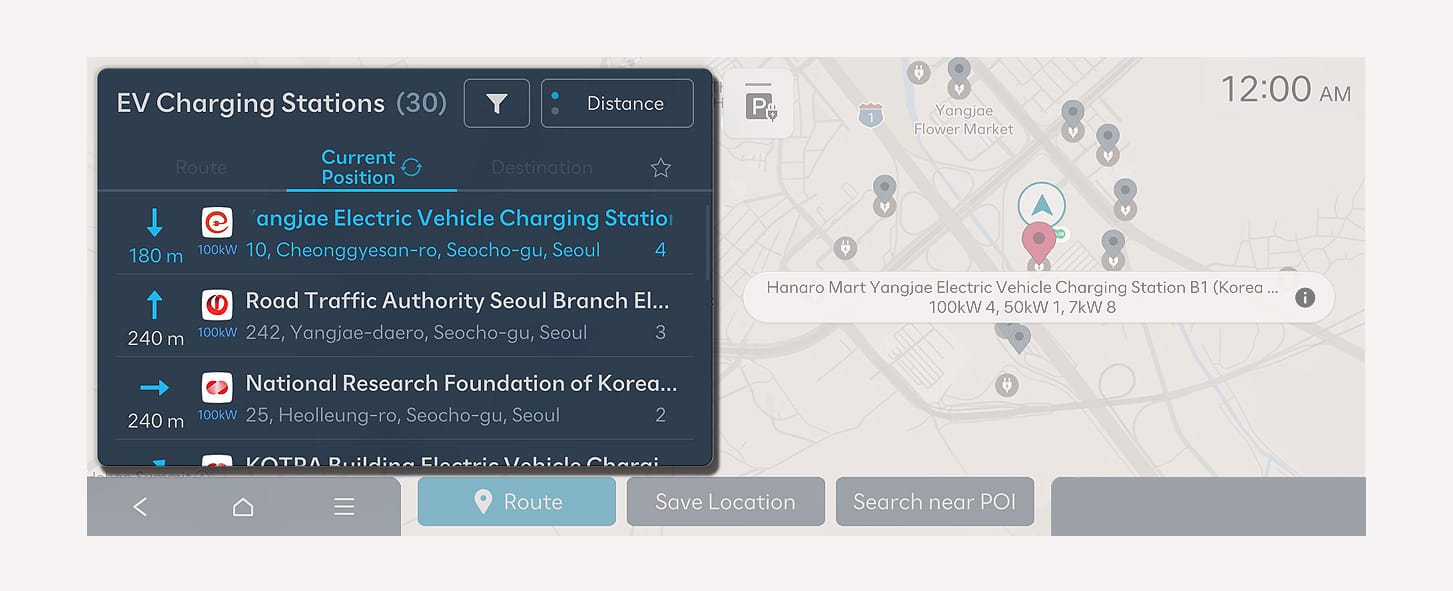
1C_ChargingStationList
-
-
Select the charging station on the list and check the detailed information.