Portable Charge (Type B)
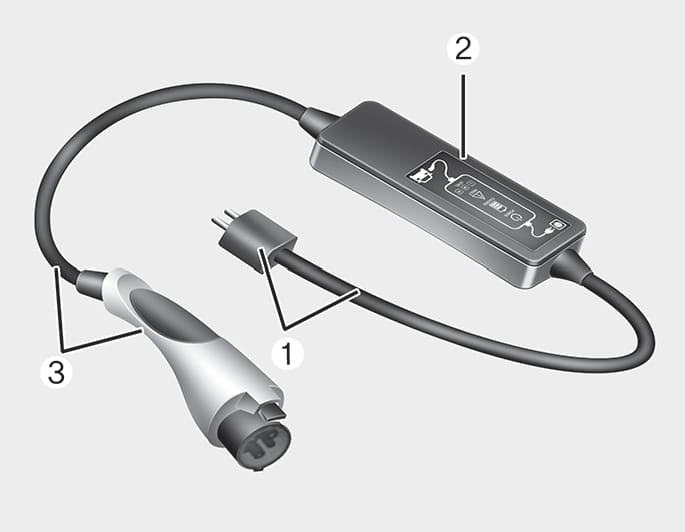
OOSEVQ018047L
- Code and Plug (Code set)
- Control Box
- Charging Cable and Charging Connector
Portable Charge can be used when AC Charge or DC Charge is not available by using household electricity.
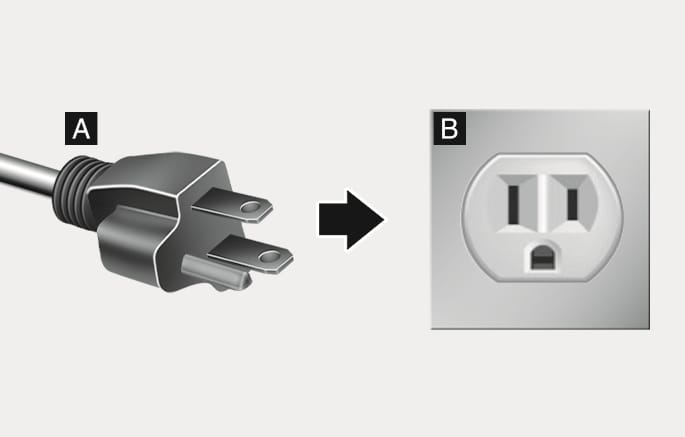
ONE1043060N
- Plug
- Electric Outlet
Charging an electric vehicle at home can stress the household electrical system more than a typical household appliance. Most modern residential electrical circuits are rated at 15 or 20 amps. The EV portable charger is rated to supply a 12 A continuous load. To avoid tripping a fuse or breaker in the household, the portable charger charging rate can be reduced. Follow the steps below to set the charging rate of the portable charger.
-
Check the current output of the electrical outlet prior to connecting the portable charger in order to determine the permissible charging rate.
-
Connect the plug to a household electric outlet.
-
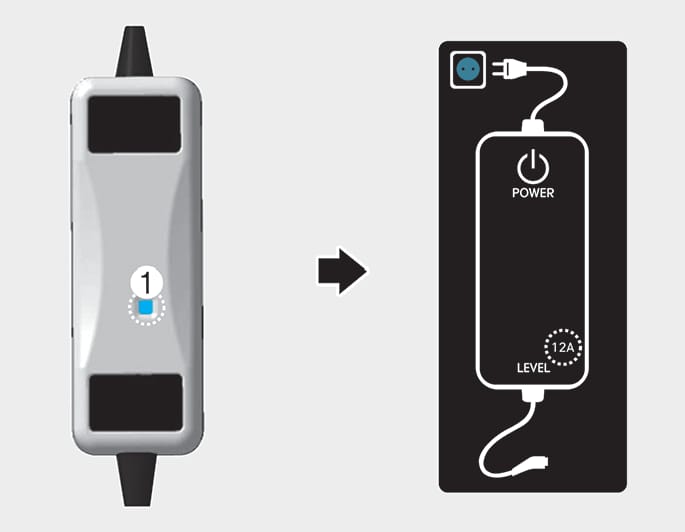
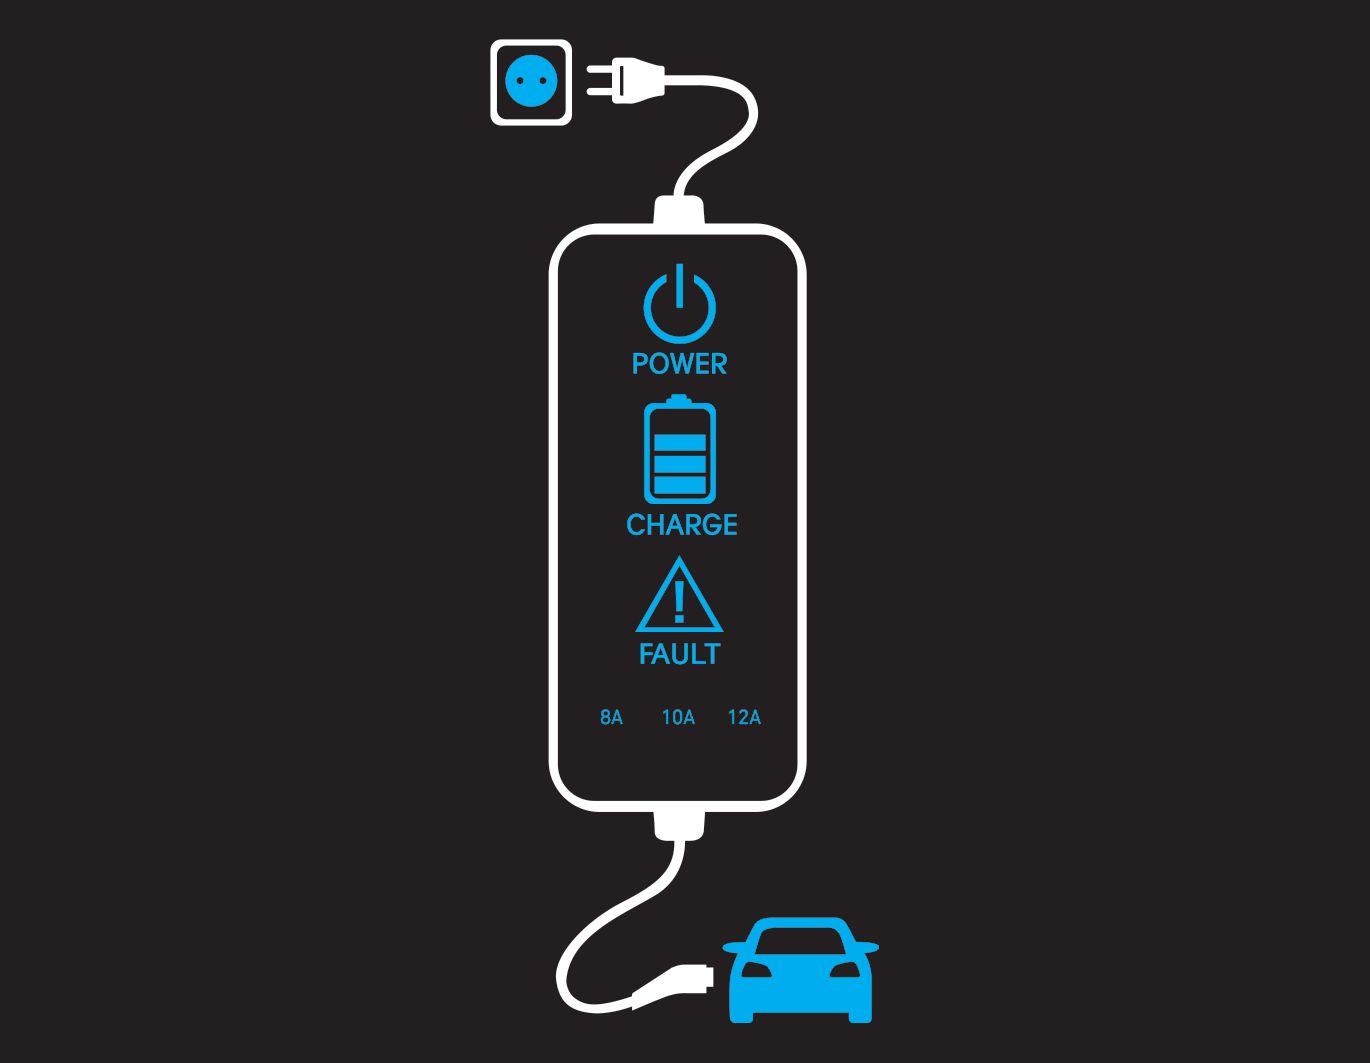
Check the LED display on the portable charger controller. The indicator 8 A, 10 A or 12 A will be displayed.
OOSEVQ018054
-
The charging rate (amps) can be adjusted on the portable charger controller. Press the button (1) on the back of the controller.
-
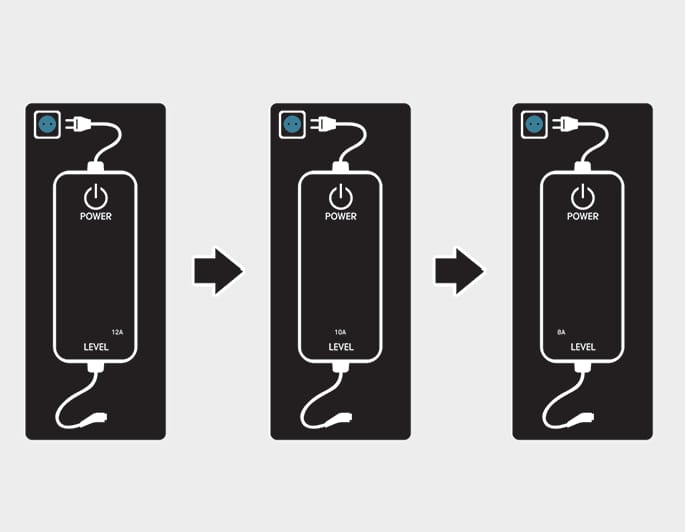
The charging rate (12 A, 10 A, 8 A) on the LED display changes each time you press the button. Refer to the table to adjust the charging rate based on the electrical outlet current output.
-
When the charging rate is set, follow the procedure in the next section to connect your vehicle.
* Example for setting the ICCB charge level
The example is only for reference and may vary according to the surrounding environment.
|
Outlet current |
ICCB charge level |
Control box display window |
|
14-16 A |
12 A |
|
|
13-12 A |
10 A |
|
|
11-10 A |
8 A |
Please make sure that charge level selection matches the capacity of your circuit breaker to avoid blown fuse.
ONE1043060N
- Plug
- Electric Outlet
-
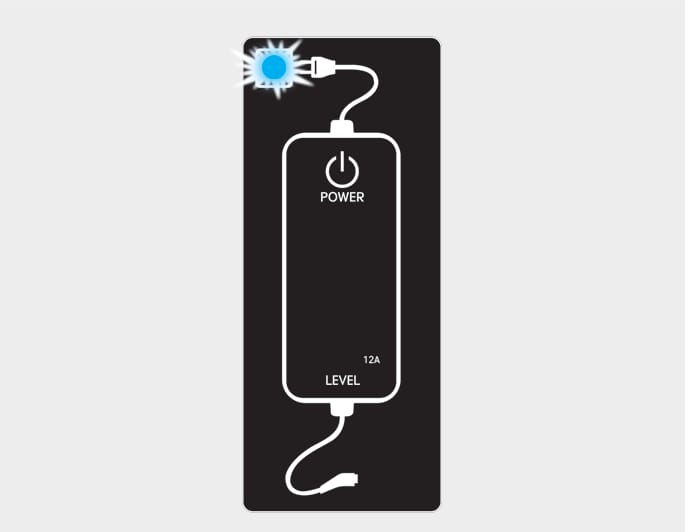
Connect the plug to a household electric outlet.
OOSEVQ018056
-
Check if the power lamp (green) illuminates on the controller.
-
Depress the brake pedal and apply the electronic parking brake.
-
Turn OFF all switches, shift to P (Park), and turn OFF the vehicle.
If charging is initiated without the gear in P (Park), charging will start only after the gear is automatically shifted to P (Park).
ONE1Q011040
-
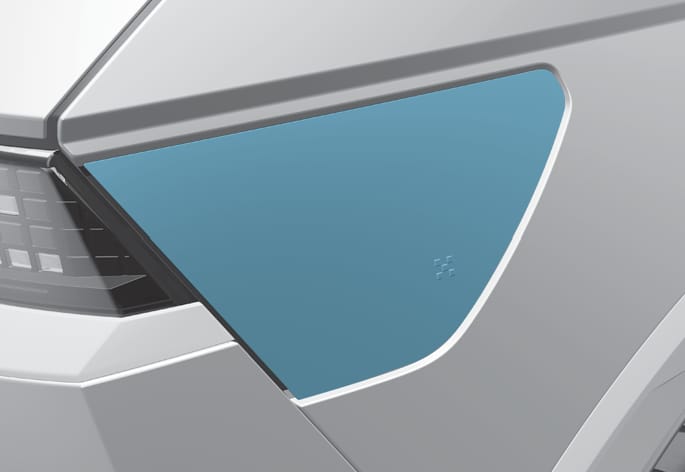
Open the charging door.
For more details, refer to ‘Electric Charging Door’ in this chapter.
If you cannot open the charging door due to freezing weather tap lightly or remove any ice near the charging door. Do not try to forcibly open the charging door.
-
Open the protection caps of the charging connector and the charging plug. Check if there are any foreign substances or dust.
-
Hold the charging connector handle and connect it to the vehicle charging inlet. Push the connector all the way in. If the charging connector and charging terminal are not connected properly, this may cause a fire.
Locking Charging Cable
Select Settings > ECO Vehicle > Charging Connector Locking Mode in the infotainment. The charging connector is locked in the inlet at a different period according to which mode is selected.
-
Always mode : The connector locks when the charging connector is plugged into the charging inlet.
-
While charging mode : The connector locks when charging starts.
For more details, refer to “Locking Charging Cable” in this chapter.
OOSEVQ018057
-
-
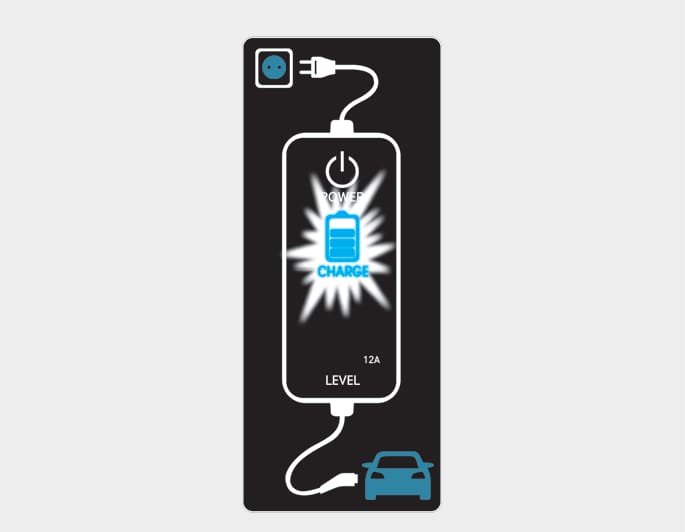
Charging starts automatically (charging lamp blinks).

ONE1Q011041
-
Check if the charging indicator light (
 ) of the high voltage battery in the instrument cluster is turned ON. Charging is not active when the charging indicator light () is OFF.
When the charging connector is not connected properly, reconnect the charging cable to charge it again.
To control the temperature of the high voltage battery while charging or when the battery temperature is high, the air conditioner is used to cool down the battery. It may generate noise or vibration from operation of the air conditioner compressor and cooling fan, but it is a normal condition when charging the high voltage battery. Also, the air conditioner’s performance may be degraded due to operation of the cooling system to charge the high voltage battery. This is a normal condition.
Even though charging is possible with the Start/Stop button in the ON/START position, for you safety, start charging when the Start/Stop button is in the OFF position and the vehicle shifted to P (Park). After charging has started, you can use electrical components such as the radio by pressing the Start/Stop button to the START or ON position.
During charging, the gear cannot be shifted from P (Park) to any other gear.
ONE1Q011058E
-
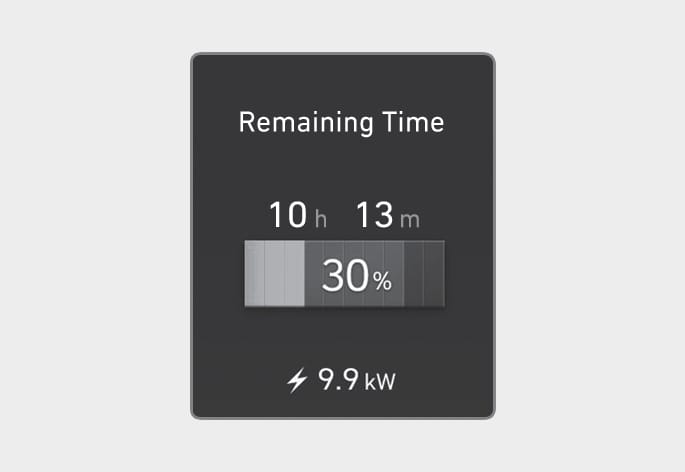
After charging has started, the estimated charging time is displayed on the instrument cluster for about 1 minute.
If you open the driver seat door while charging, the estimated charging time is also displayed on the instrument cluster for about 1 minute. When scheduled charging or scheduled air conditioner/heater is set, the estimated charging time is displayed as “--” .
Depending on the condition and durability of the high voltage battery, charger specifications, and ambient temperature, the time required for charging the battery may vary.
When charging the high voltage battery, the charge level can be checked from outside the vehicle.
For more details, refer to ‘Charge indicator lamp for electric vehicle’ in this chapter.
|
Control Box |
Indicator |
Details |
|||
|
PLUG |

(Green) |
On : Power on Blink : Plug temperature sensor failure |
||
|
(Red) |
On : Plug high temperature protection Blink : Plug high temperature warning |
||||
|
POWER |

|
On : Power on |
|||
|
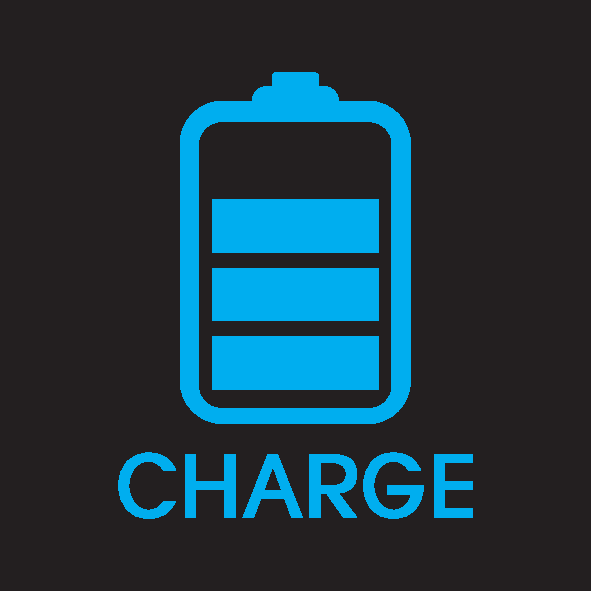
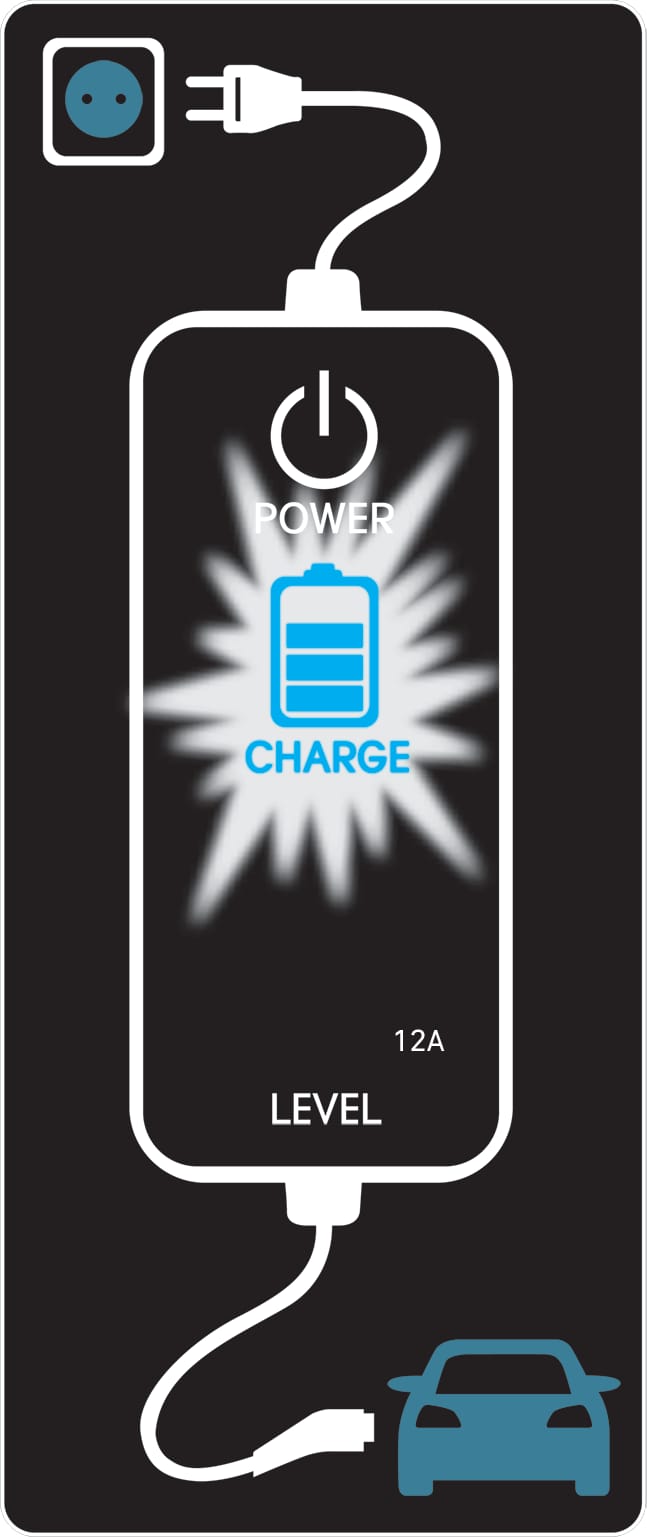
CHARGE |
|
Blink : Charging in power saving mode, only the CHARGE indicator is illuminated. |
|||
|
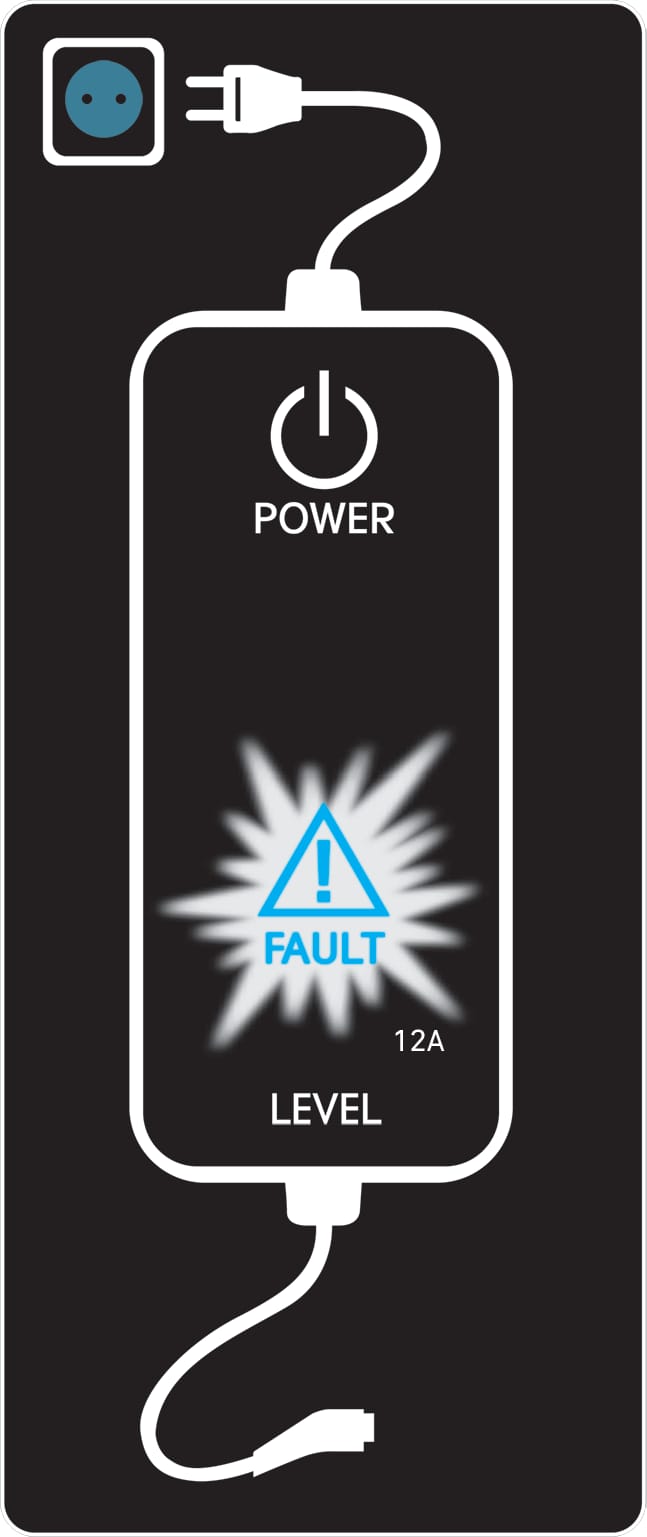
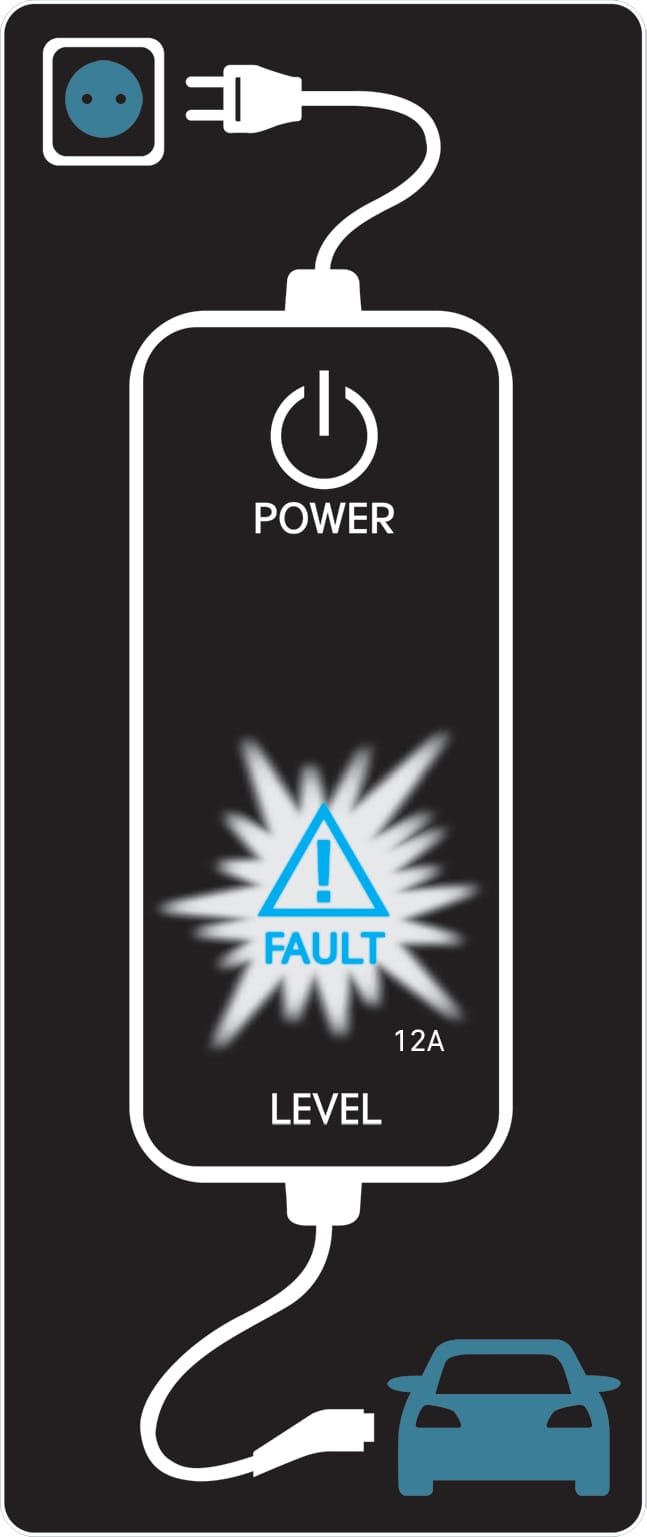
FAULT |

|
Blink : Charging interrupted |
|||
|
CHARGE LEVEL |

|
Charging current 12 A |
The charging current changes (3 level) whenever the button (1) is pressed for 1 sec with the charger plugged into an electrical outlet but not the vehicle. |
* Back of the control box 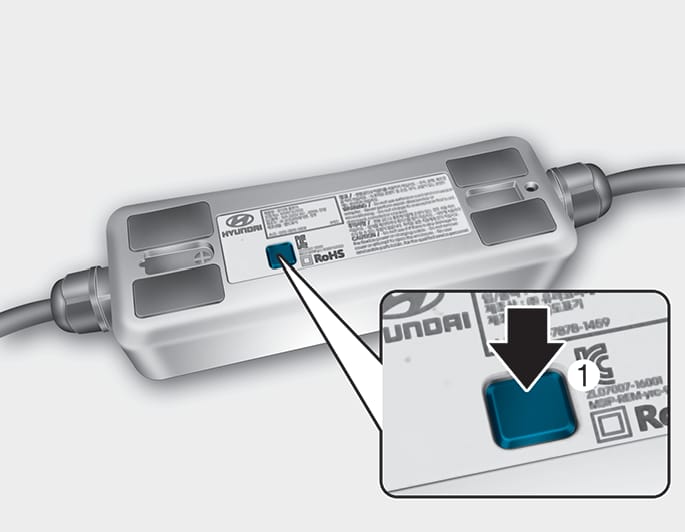
|
|

|
Charging current 10 A |
||||

|
Charging current 18 A |
||||
|
VEHICLE |

(Green) |
Charging connector plugged |
|||
|
(Blue) |
Charging |
||||
|
(Red) |
Blink : Charging impossible |
||||
|
NO |
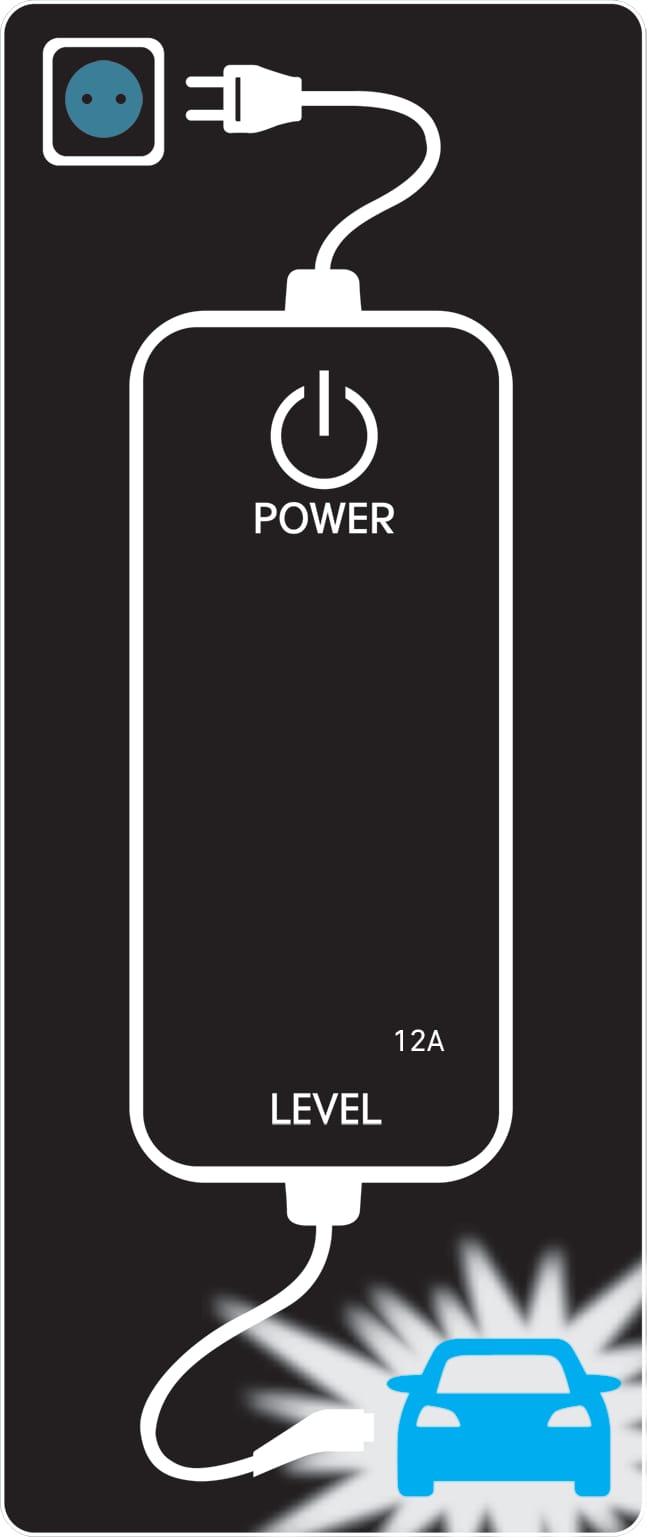
Control Box |
Status / Diagnosis / Countermeasure |
NO |
Control Box |
Status / Diagnosis / Countermeasure |
|
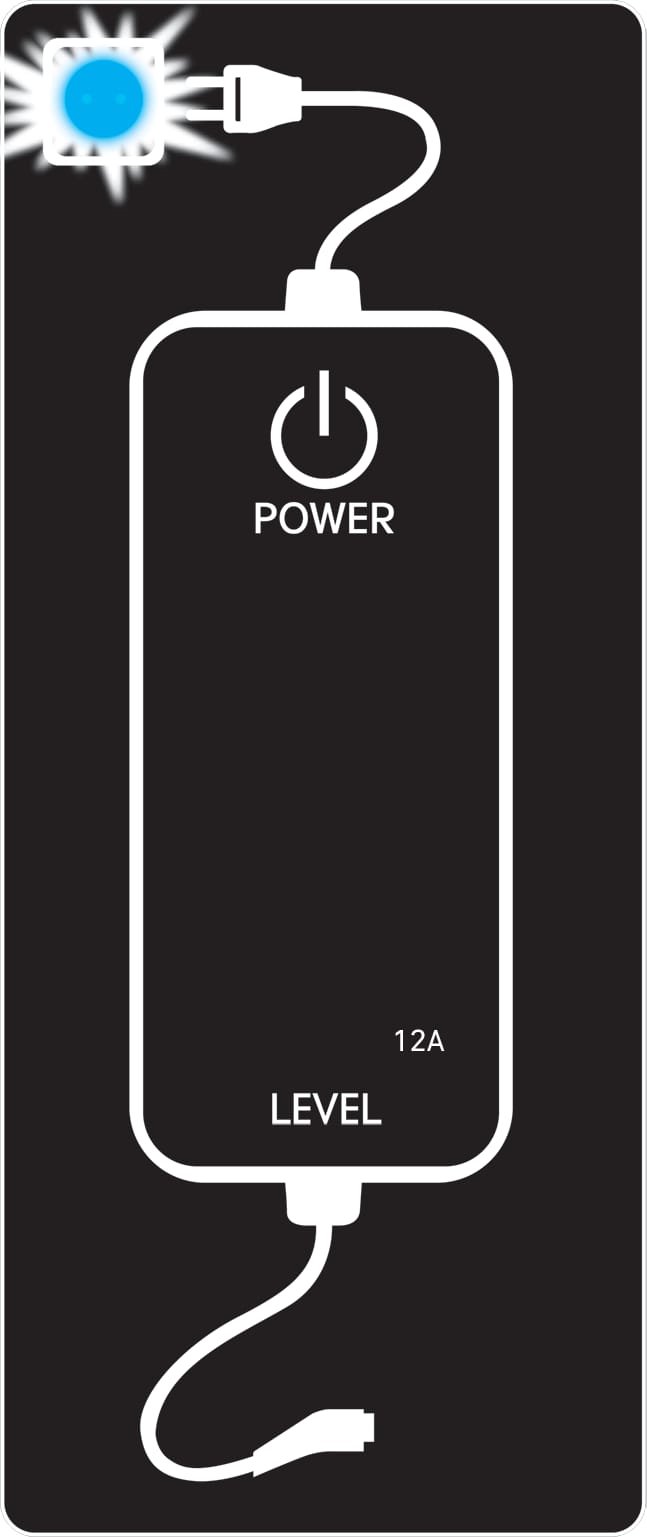
1 |
|
Contact an authorized HYUNDAI dealer. |
2 |
|
|
|
3 |
|
|
4 |
|
Contact an authorized HYUNDAI dealer. |
|
5 |
|
Contact an authorized HYUNDAI dealer. |
6 |
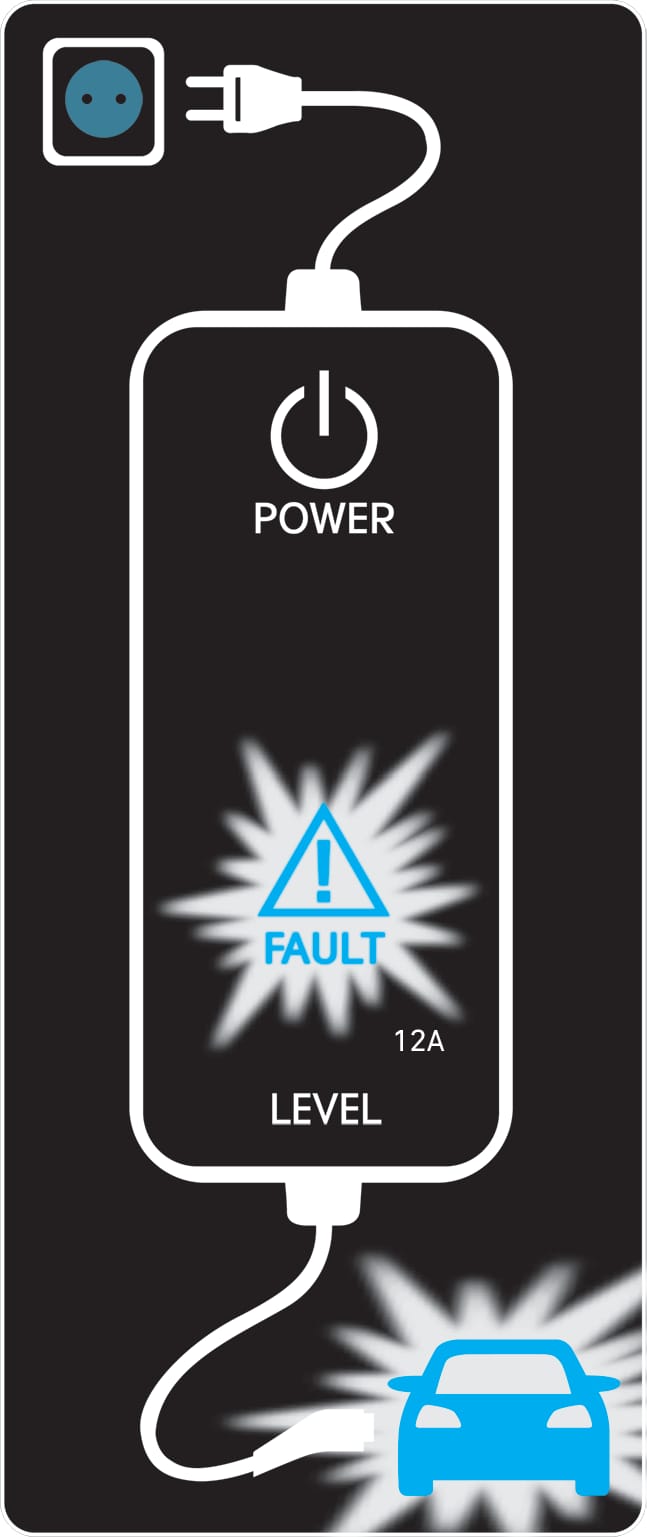
|
Contact an authorized HYUNDAI dealer. |
|
7 |
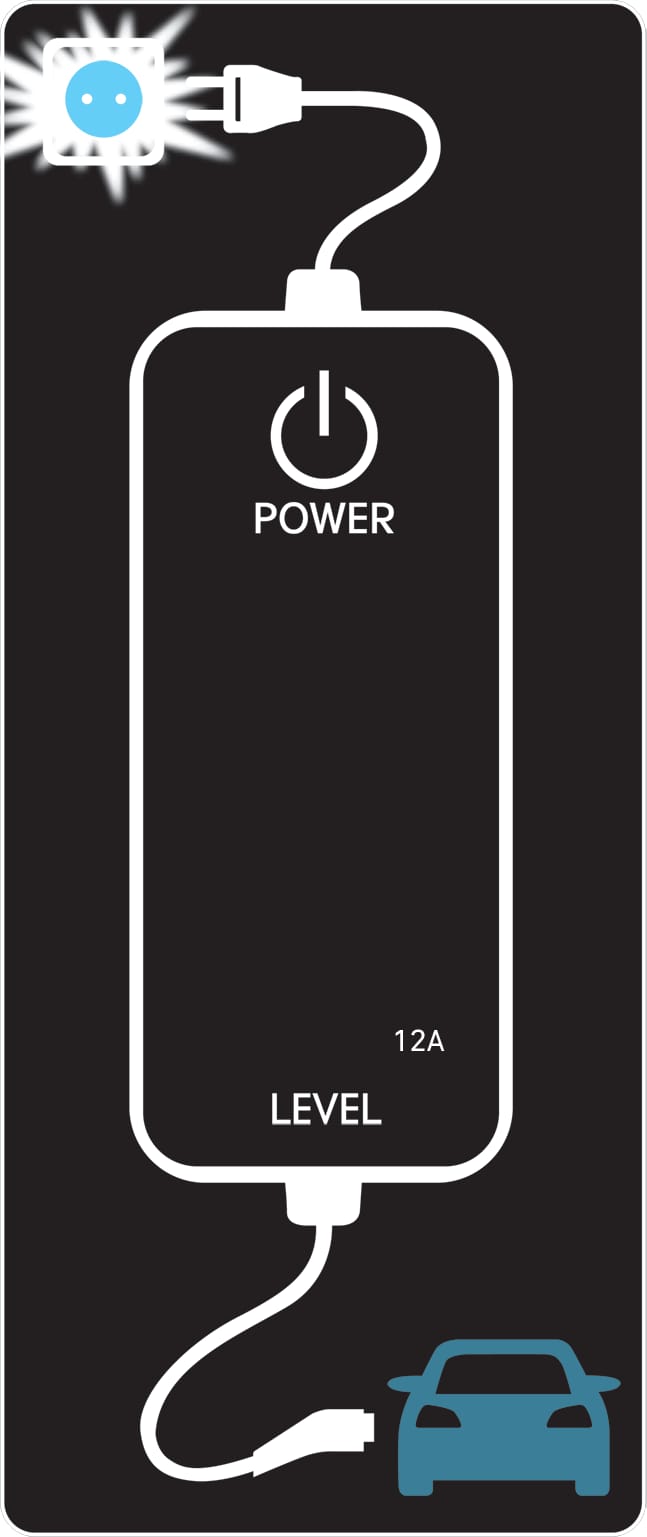
|
Contact an authorized HYUNDAI dealer. |
8 |

|
|
-
Hold the charging connector handle and pull it out.
To prevent charging cable theft, the charging connector cannot be disconnected from the inlet when the doors are locked or the charging connector is in the LOCK mode. Unlock all doors to disconnect the charging connector from the inlet.
However, if the vehicle is in the charging connector AUTO mode, the charging connector automatically unlocks from the inlet when charging is completed.
If the charging connector is disconnected while the release button is not pressed, the connector and the inlet may be damaged.
For more details, refer to “Charging Connector AUTO/ LOCK Mode” in this chapter.
If the release button does not work even after the all doors are unlocked, pull the emergency lift cable in the motor room and press the release button in the connector to disconnect it from the vehicle. If the release button still does not work, consult an authorized HYUNDAI dealer.
-
Make sure to completely close the charging door.
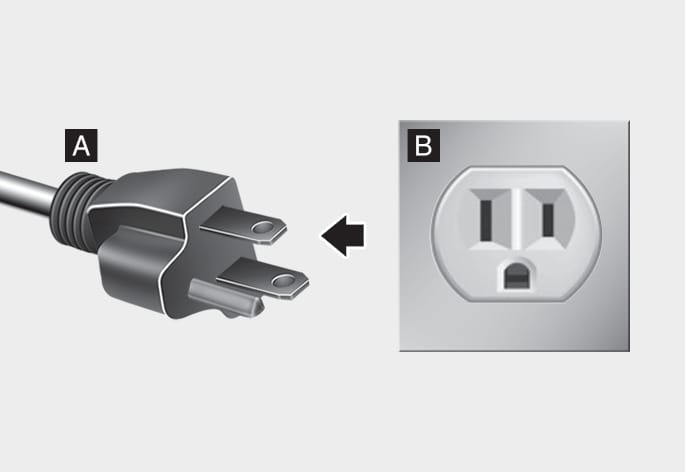
ONE1Q012103N
- Plug
- Electric Outlet
-
Disconnect the plug from the household electric outlet. Do not pull the cable when disconnecting the plug.
-
Close the protection caps of the charging connector and the charging plug to protect them from foreign substances.
-
If the personal charging connector is used, store the connector in the cable compartment.
-
Use the portable charger that is certified by HYUNDAI.
-
Do not try to repair, disassemble, or adjust the portable charger.
-
If an extension cord is used it must be rated for heavy duty of at least 15A. Keep as short as possible.
-
Stop using immediately when failure occurs.
-
Do not touch the plug and charging connector with wet hands.
-
Do not touch the terminal part of the AC charging connector and the AC charging port on the vehicle.
-
Do not connect the charging connector to voltage that does not comply with regulations.
-
Do not use the portable charger if it is worn, if any of the wiring is exposed, or if there are any signs of damage to the cable or connector.
-
Do not let children operate or touch the portable charger.
-
Do not let the controller to be in contact with water.
-
Keep the normal charging connector or plug terminal free of foreign substances.
-
Do not step on the cable or cord. Do not pull the cable or cord and do not twist or bend it.
-
Do not attempt to charge the vehicle outside during inclement weather when there is the possibility of lightning.
-
Do not drop the controller or place heavy objects on the equipment.
-
Do not place an object that can generate high temperatures near the charger when charging.
-
Before plugging into any electrical outlet, have a qualified electrician inspect and verify the household electrical system for heavy duty service at a 12 amp continuous load.
-
Stop using the portable charger immediately if the household electric outlet or any components becomes overheated or has a burning smell.