Using the Tire Mobility Kit When a Tire is Flat
2C_HowToUseTMK
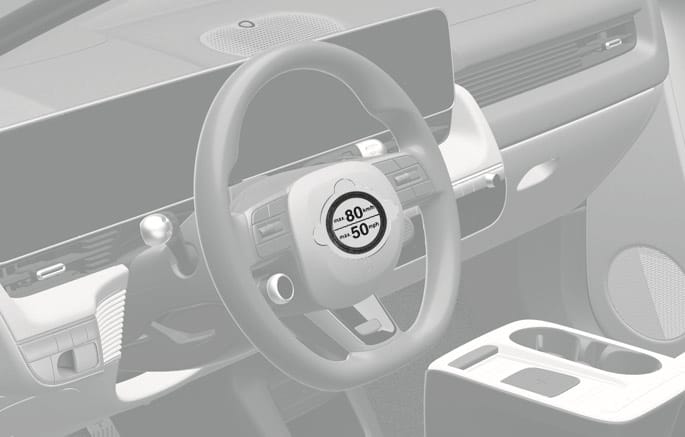
Detach the speed restriction label (1) from the sealant bottle (2), and place it in a highly visible place inside the vehicle such as on the steering wheel to remind the driver not to drive too fast.
If only the tire pressure needs to be adjusted, refer to “How to Adjust Tire Pressure” in this chapter.
Before using the Tire Mobility Kit, be fully aware of the explanation on the sealant.
-
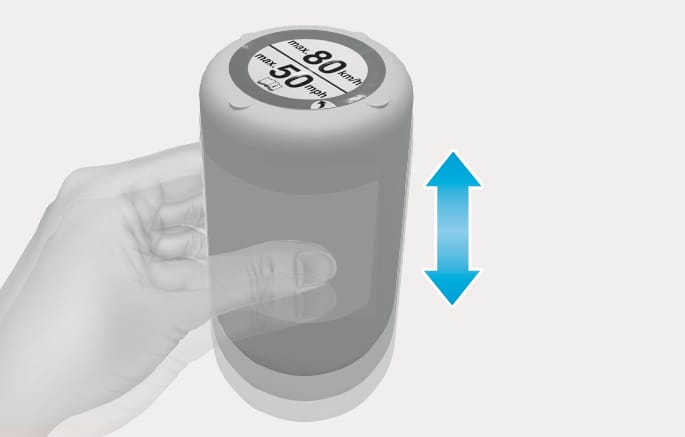
Shake the sealant bottle.
2C_TMKProcedure
-
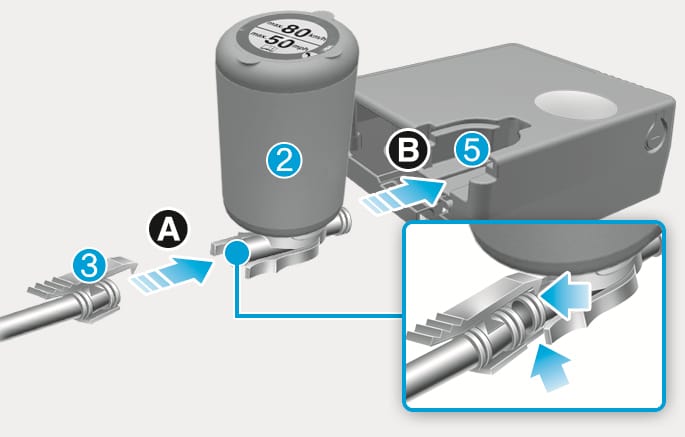
Connect the filling hose (3) to the sealant bottle (2) in the direction of (A) and connect the sealant bottle to the compressor (5) in the direction of (B).
2C_TMKProcedure_2
-
Make sure the compressor valve on the filling hose is locked.
-
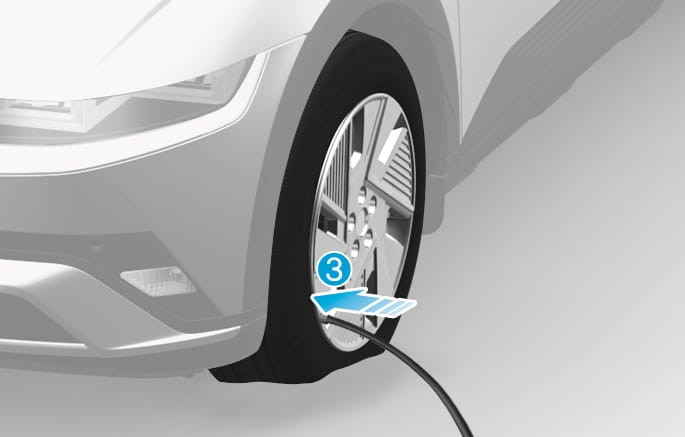
Unscrew the valve cap and screw the filling hose (3) onto the tire valve.
2C_TMKProcedure_3
Securely install the sealant filling hose to the valve. If not, sealant may flow backward, possibly clogging the filling hose.
-
Plug the compressor power cord (4) into the vehicle power outlet.
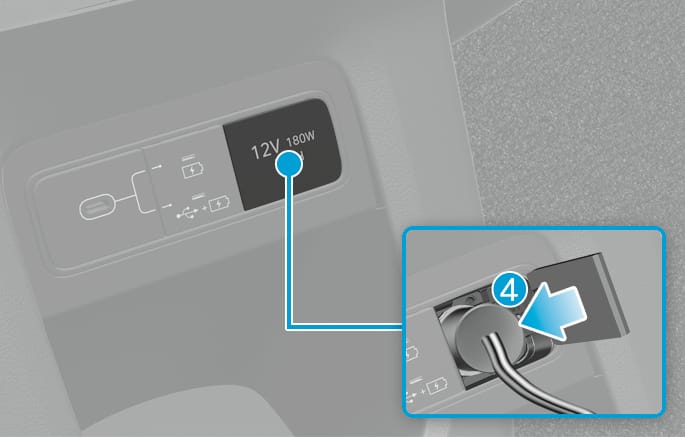
2C_TMKProcedure_4
Only use the front passenger side power outlet when connecting the power cord.
-
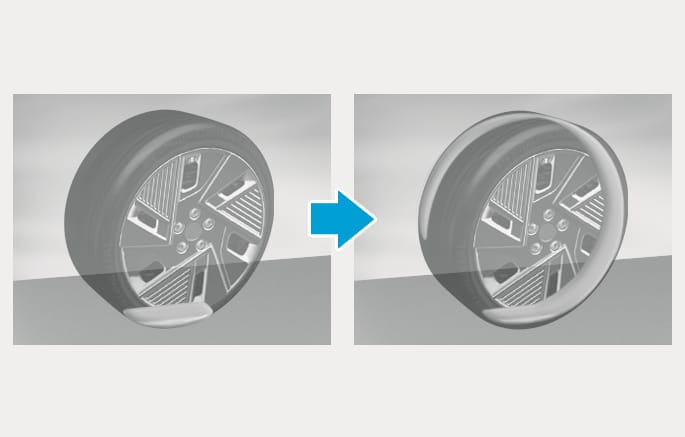
With the vehicle ON (
¢ indicator ON), switch on the compressor and let it run for about 5~7 minutes to fill the sealant up to proper pressure. (refer to the "Tires and wheels" section in chapter 10.).With the vehicle ON (
¢ indicator ON), switch on the compressor and let it run for about 5~7 minutes to fill the sealant up to proper pressure. (refer to the "Tires and wheels" section in chapter 10 of the complete Owner's Manual.).Be careful not to overinflate the tire and stay away from the tire when filling it.
Tire pressure
Do not attempt to drive your vehicle if the tire pressure is below 29 psi (200 kPa). This could result in an accident due to sudden tire failure.
-
Switch off the compressor.
-
Detach the hoses from the sealant bottle connector and from the tire valve.
Return the Tire Mobility Kit to its storage location in the vehicle.
-
Immediately drive about 4~6 mi. (7~10 km or, about 10 min) to evenly distribute the sealant in the tire.
Do not exceed a speed of 50 mph (80 km/h). If possible, do not fall below a speed of 12 mph (20 km/h).
While driving, if you experience any unusual vibration, ride disturbance or noise, reduce your speed and drive with caution until you can safely pull off of the side of the road.
Call for road side service or towing.
2C_TMKPrecedure_5
-
After driving about 4~6 mi. (7~10 km or about 10 min), stop at a safe location.
-
Connect the filling hose (3) of the compressor directly to the tire valve.
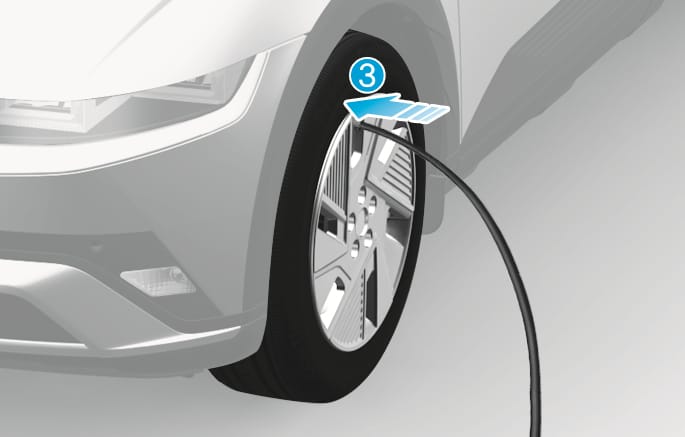
2C_TMKProcedure_6
-
Plug the compressor power cord into the vehicle power outlet.
-
Adjust the tire inflation pressure to the recommended tire inflation.
With the Vehicle is ON (
¢ indicator ON) proceed as follows.-
To increase the inflation pressure: Switch on the compressor. To check the current inflation pressure setting, briefly switch off the compressor.
-
To reduce the inflation pressure: Rotate the deflation valve (9) on the filling hose (3).
-
Do not let the compressor run for more than 10 minutes, otherwise the device will overheat and may be damaged.
The pressure gauge may show higher than actual reading when the compressor is running. To get an accurate tire reading, the compressor needs to be turned off.
-
If the inflation pressure is not maintained, drive the vehicle a second time, refer to step 9. Then repeat steps 10 to 13.
-
Use of the TMK may be ineffectual for tire damage larger than about 0.16 in (4 mm).
-
Contact an authorized HYUNDAI dealer if the tire cannot be made roadworthy with the Tire Mobility Kit.
The tire inflation pressure must be at least 32 psi (220 kPa). If it is not, do not continue driving.
Call for road side service or towing.
Tire pressure sensor
The sealant on the tire pressure sensor and wheel should be removed when you replace the tire with a new one and inspect the tire pressure sensors. Have you get this done at an authorized HYUNDAI dealer.
When reinstalling the repaired or replaced tire and wheel on the vehicle, tighten the wheel lug nut to 79~94 lbf·ft (11~13 kgf·m).